
A sourdough starter that stops bubbling is rarely dead; it’s a dormant microbial ecosystem sending specific distress signals through its smell and texture.
- Your starter’s aroma is a diagnostic tool: acetone means severe hunger, while vinegar indicates an imbalance correctable with warmth and feeding.
- The flour you use is critical. Bleached supermarket flour lacks the necessary microorganisms and can starve your starter’s yeast and bacteria.
Recommendation: Instead of discarding it, diagnose the specific signal your starter is sending and adjust its environment (temperature) or food (flour type and feeding schedule) accordingly.
You followed the instructions perfectly. For a week, your jar of flour and water was alive, bubbling with promise. Then, on day seven, silence. The bubbles vanished, a strange smell emerged, and a wave of panic set in: “I’ve killed it.” This is the moment many beginner bakers give up, convinced they lack the magic touch. The internet offers a deluge of conflicting advice—”feed it more,” “it’s too cold,” “change the water”—that often feels like guesswork.
The frustration is understandable, but the diagnosis is almost always wrong. From a microbiological perspective, your starter isn’t dead; it’s communicating. That jar of goo isn’t just a simple mixture; it’s a dynamic microbial ecosystem containing wild yeasts (like Saccharomyces cerevisiae) and bacteria (like Lactobacillus). When its activity changes, it’s sending you precise distress signals about its environment or its food source. The key to revival isn’t a magic trick, but a diagnostic process.
But what if the real problem isn’t your technique, but the very ingredients you trust? The answer often lies in understanding the science behind the fermentation process. Instead of simply following a recipe, this guide will teach you to interpret your starter’s signals. We will move beyond the platitudes and explore the metabolic state of your starter, decode its aromas, and provide a science-backed plan to bring it back to vigorous life. We’ll analyze why your flour might be failing you and how to manage temperature, no matter where you live.
For those who prefer a visual summary, the following video humorously explores the common pitfalls that can lead a starter to become dormant, complementing the diagnostic approach we’ll be taking in this article.
This article provides a structured, diagnostic journey to understand and revive your sourdough starter. We’ll cover everything from interpreting its smells to choosing the right flour and even scaling up your baking, providing you with the knowledge to manage your starter’s health with confidence.
Summary: Your Diagnostic Guide to Reviving a Sourdough Starter
- Acetone or Vomit: What Does the Smell of Your Starter Mean?
- The “Poke Test” is a Lie: How to Really Know When Dough is Proved?
- Bleached vs Unbleached: Why Your Supermarket Flour Won’t Hold Structure?
- Proving in Winter: How to Keep Dough Warm in a Cold House?
- Discard Crumpets: The Best Way to Use Up Excess Starter?
- The Scheduling Hack to Bake 20 Loaves in a Domestic Oven
- How to Preserve E-Bike Battery Life During a Canadian Winter?
- Hobby or Business: When Does Selling Sourdough Require a Commercial Kitchen?
Acetone or Vomit: What Does the Smell of Your Starter Mean?
Before taking any action, your first diagnostic tool is your nose. The aroma of your starter is a direct report on its metabolic state and the balance of yeast and bacteria. A smell of acetone (nail polish remover) is an urgent distress signal. It indicates that the yeast and bacteria have consumed all available sugars and have begun producing ketones. This is a sign of severe starvation. Conversely, a cheesy or “vomit” smell, while alarming, is often a normal phase in a young starter (under 14 days old). It’s caused by temporary dominance of certain bacteria like Leuconostoc, which will be outcompeted by desirable Lactobacillus strains as the starter matures.
The environment also plays a crucial role. For instance, Canadian bakers in colder homes might notice a sharper, more vinegary smell. This is due to slower fermentation below 21°C (70°F), which favors the production of acetic acid. In contrast, bakers in the warmer southern USA may battle acetone smells more frequently as the accelerated fermentation demands twice-daily feedings to keep up. The goal is a balance between lactic acid (which gives a mild, yogurt-like tang) and acetic acid (which provides a sharper sourness). A starter maintained at a stable 21-24°C (70-75°F) is most likely to achieve this pleasant balance.
This quick-reference chart, based on data from commercial baking suppliers, provides a clear diagnostic path from smell to solution. It turns olfactory observations into an actionable plan.
| Smell Type | Diagnosis | Immediate Action | Prevention |
|---|---|---|---|
| Acetone/Paint Thinner | Severely underfed | Feed 1:5:5 ratio immediately | Feed every 12 hours at room temp |
| Strong Vinegar | Acetic acid buildup | Discard 80%, feed generously | Keep warmer (21-24°C) |
| Alcohol/Booze | Hooch formation | Pour off liquid, feed normally | Refrigerate if not baking soon |
| Cheese/Sour Milk | Lactic acid dominance | Continue regular feeding | Maintain consistent schedule |
Ultimately, learning to interpret these aromas transforms you from a recipe-follower into a fermentation manager. You begin to understand what your microbial ecosystem needs before it reaches a critical state of dormancy.
The “Poke Test” is a Lie: How to Really Know When Dough is Proved?
One of the most repeated pieces of sourdough advice is to use the “poke test” to determine if your dough is ready for the oven. This method—poking the dough to see how quickly it springs back—is notoriously unreliable for beginners. It’s subjective and varies dramatically with dough hydration, flour type, and shaping tension. A new baker can easily misinterpret the signs, leading to under-proofed, dense loaves or over-proofed, flat ones. This is not a failure of your starter; it’s a failure of the diagnostic tool.
A far more precise and scientific method is the Aliquot Jar. This technique involves placing a small sample of your dough (around 50g) into a small, straight-sided jar at the same time you begin your bulk fermentation. By marking the initial level, you can objectively measure the percentage of volume increase. This removes all guesswork. You are no longer guessing based on a “feel”; you are measuring the direct output of your starter’s fermentation activity. For most doughs, a 50-70% rise in the aliquot jar indicates peak fermentation, the perfect time to shape your loaf.
As you can see in the comparison, the dough’s internal structure and volume change predictably. This visual data is far more reliable than a poke. If you are working with a weaker or recently revived starter, you might need to let the aliquot sample rise more, perhaps to 80-100%, to ensure the main dough has developed enough strength and gas. This method not only improves your results but also serves as an excellent tool for fermentation diagnostics, helping you document the time and temperature your specific starter needs to perform optimally.
Your Action Plan: The Aliquot Jar Method for Perfect Proofing
- Dough Sample: After mixing, reserve 50g of dough and place it in a straight-sided jar.
- Mark Level: Use a rubber band or marker to indicate the initial dough level.
- Consistent Temperature: Place the jar next to your main dough so it experiences the same conditions.
- Monitor Rise: Observe the percentage of volume increase. A 50-70% rise is typically optimal for shaping.
- Adjust for Weakness: If using a weaker starter, aim for a higher rise (80-100%) to compensate.
- Document Results: Note the time, temperature, and percentage rise to build a predictable schedule for future bakes.
Bleached vs Unbleached: Why Your Supermarket Flour Won’t Hold Structure?
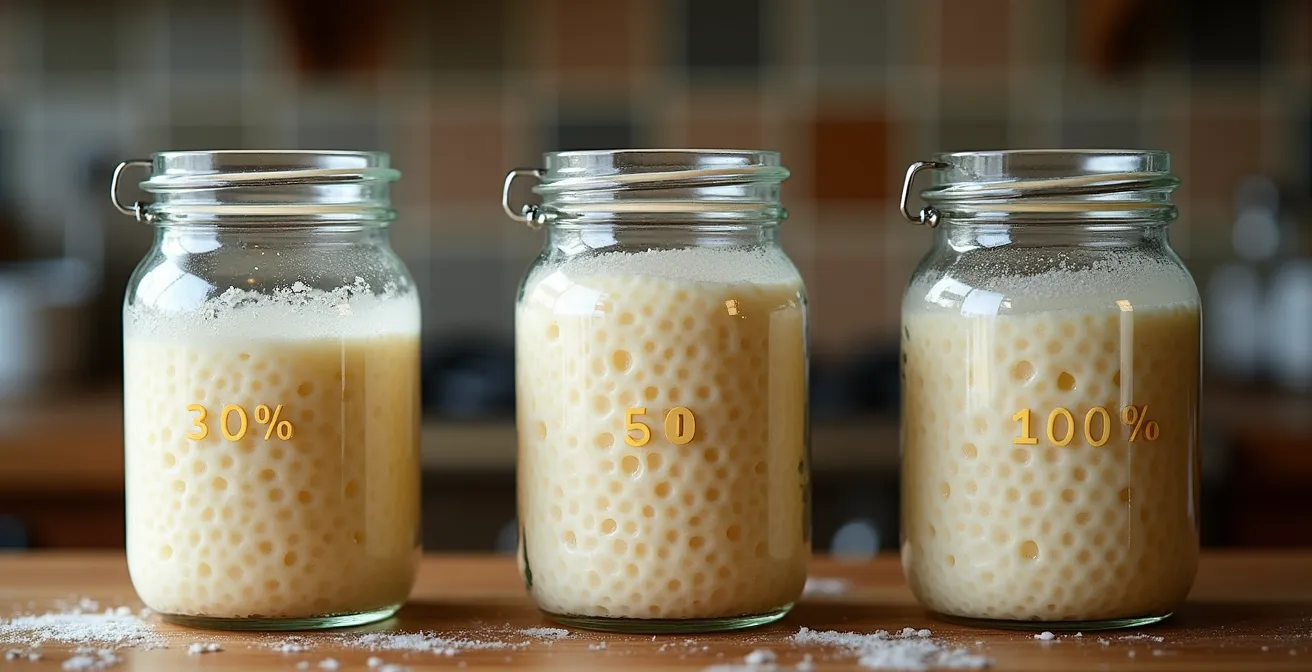
If you’ve addressed temperature and feeding schedule but your starter remains sluggish, the culprit is often the flour itself. Not all flours are created equal, and using the wrong kind is like feeding an athlete junk food. The most common issue is using bleached all-purpose flour. Bleaching agents like benzoyl peroxide or chlorine dioxide are used to whiten flour and speed up aging, but they do so by oxidizing it. This process damages not only the protein-forming potential (gluten) but also the natural microorganisms present on the wheat berry. In fact, bleached flour can reduce natural microorganism content by up to 70%, effectively starving your starter of the diverse food and partners it needs to thrive.
The type of flour available varies significantly by country. In the USA, a brand like King Arthur Unbleached All-Purpose (11.7% protein) is a reliable choice because it is never bleached and has no additives. In Canada, Robin Hood “Best for Bread” flour boasts a high protein content (around 13%), but it’s crucial to select the “unbleached” version, as the standard “Original” version contains bleaching agents. For UK bakers, looking for the “Strong” designation on brands like Marriage’s or Allinson’s ensures a protein content over 12%, suitable for sourdough. In China, where local flours are often bleached, bakers may need to seek out imported brands like Bob’s Red Mill to ensure they are using unbleached, high-protein flour.
Case Study: Reviving a Starter with a ‘Superfood’ Boost
A baker struggling with a weak starter fed with bleached all-purpose flour found a simple solution. By adding just 10% whole rye flour to each feeding, the starter’s health was transformed. Within three days, the starter was doubling in size and had developed a robust, tangy aroma. The rye flour acted as a ‘superfood,’ reintroducing a diverse population of wild yeasts and bacteria that the bleached flour lacked, essentially rebooting the entire microbial ecosystem.
This table provides a quick guide to selecting starter-safe flours in different regions, helping you avoid the common pitfall of using nutrient-poor, bleached varieties.
| Country | Recommended Brands | Avoid for Starter | Special Notes |
|---|---|---|---|
| USA | King Arthur Unbleached (never bleached) | Store brand bleached AP | King Arthur: 11.7% protein, no additives |
| Canada | Robin Hood Best for Bread (unbleached version) | Robin Hood Original (contains benzoyl peroxide) | 13.3% protein but check for additives |
| UK | Marriage’s Strong White, Allinson’s Strong | Plain flour under 11% protein | Look for ‘Strong’ designation = 12%+ protein |
| China | Bob’s Red Mill (imported), Anchor High-Gluten | Local bleached AP flours | Check Taobao/JD for imported unbleached options |
Proving in Winter: How to Keep Dough Warm in a Cold House?
Your starter is a living colony, and like most living things, it has a preferred temperature range. Yeasts and bacteria are most active between 24-28°C (75-82°F). When your kitchen temperature drops in winter, your starter’s metabolic activity plummets. It doesn’t die; it goes into a state of semi-dormancy, much like a hibernating animal. The challenge, then, is to create a small, consistently warm micro-climate for it to thrive.
You don’t need expensive equipment to do this. People have been baking bread in cold climates for centuries using simple, low-tech solutions. The key is to find a spot in your home that provides a gentle, consistent warmth. In Canada, a common trick is to place the starter on top of a refrigerator, where heat rises from the compressor. In the UK, the traditional airing cupboard near a hot water heater provides a perfect nook. For American bakers, a simple seed germination mat, often available for under $20, can be placed under a box to create a reliable proofing environment. And in China, many households have yogurt makers or rice wine fermentation boxes that can be set to the ideal 25-30°C.
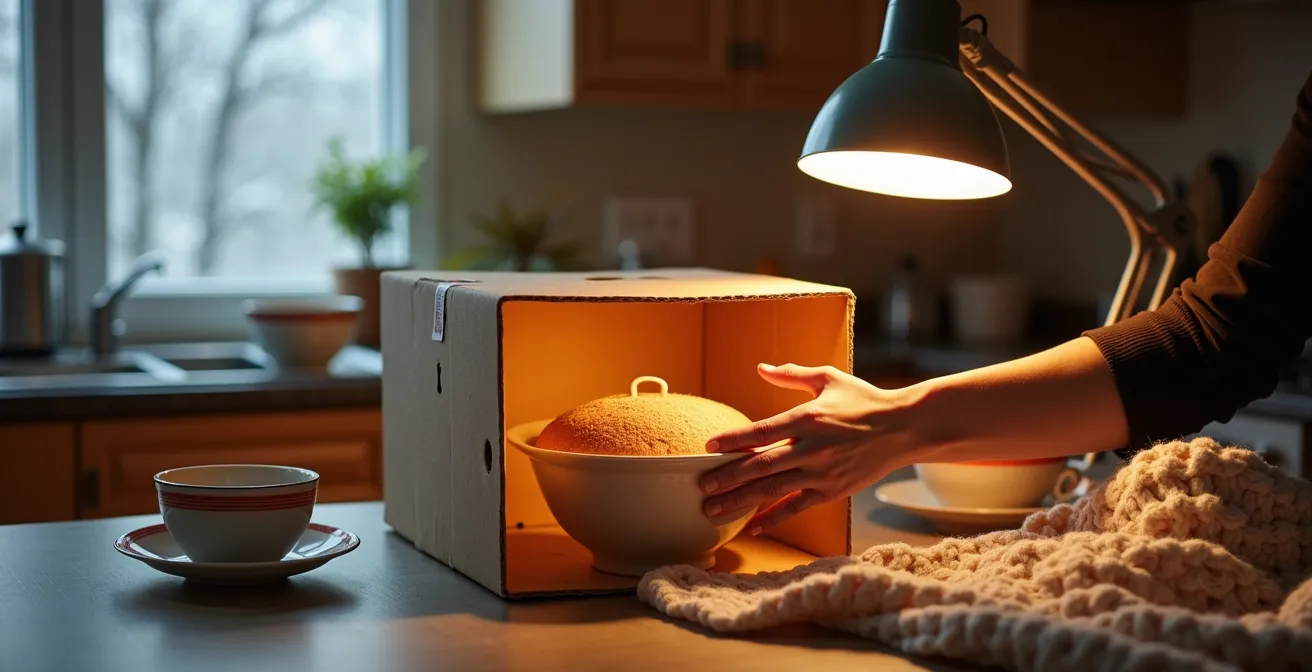
Perhaps the most universal solution is using your oven. Simply turning the oven light on (and leaving the heat off) can often raise the internal temperature to a perfect 75-80°F (24-27°C). Just be sure to place a thermometer inside to verify the temperature, as some oven lights run hotter than others. As a last resort, a picnic cooler with a jar of hot water placed inside creates a temporary humid-and-warm proofing box; just remember to replace the hot water every few hours.
- Universal Method: Place your starter in the oven with only the light on. Verify the temperature is between 75-80°F.
- Canadian Hack: Utilize the gentle heat rising from the top of your refrigerator’s compressor.
- UK Tradition: Use an airing cupboard or a spot near your hot water heater, wrapped in a towel.
- USA DIY: A seed germination mat placed under a cardboard box creates a stable, low-cost proofing box.
- Emergency Solution: A cooler with a jar of hot water, replaced every 4 hours, can save a sluggish fermentation.
Discard Crumpets: The Best Way to Use Up Excess Starter?
As you work to revive and maintain your starter, you’ll inevitably accumulate “discard”—the portion you remove before feeding. For a beginner, this can feel incredibly wasteful, especially when your starter isn’t yet strong enough for bread. However, this is a critical shift in mindset: discard is not waste, it is a flavor ingredient. This tangy, slightly acidic batter can be used in a huge variety of recipes where its leavening power is secondary to its taste.
This is where baking becomes truly regional and creative. Instead of throwing it away, you can use your discard to make dishes unique to your culinary heritage. A Canadian baker might mix it with maple syrup and pecans to create delicious Maple-Pecan Sourdough Scones. In the southern USA, the discard adds a characteristic tang to fluffy Southern-style biscuits when combined with buttermilk. UK bakers can whip up savory cheese and chive pikelets, a close cousin to crumpets. And in China, sourdough discard can be used in place of water in a traditional scallion pancake (葱油饼) recipe, adding a complex sour note that elevates the dish.
This approach turns a moment of potential frustration (what to do with this stuff?) into an opportunity for delicious experimentation. A great tip is to keep a “discard jar” in the refrigerator, collecting the unfed starter for up to two weeks. This gives you a larger amount to work with for recipes like pizza dough or pancakes over the weekend.
After thinking I killed my starter, I used the ‘dead’ discard to make scallion pancakes. They were incredible! The slightly sour tang complemented the savory scallions perfectly. Now I deliberately let some starter get hungry just for that flavor. What felt like waste became my family’s favorite weekend breakfast.
– Home baker from Vancouver
This experience is common. The “problem” of discard becomes the “solution” for a new favorite meal. It’s the first step in seeing your starter not just as a tool for bread, but as a versatile flavor-generator for your entire kitchen.
The Scheduling Hack to Bake 20 Loaves in a Domestic Oven
Once your starter is revived and consistently vigorous, a new world of possibilities opens up. The predictable rise times of a healthy microbial ecosystem allow for something that seems impossible with a sluggish starter: scheduling. With a strong starter, you can plan your bakes with precision, moving beyond a single, hopeful loaf to a consistent, high-volume output, even from a small domestic kitchen.
The key is a technique called cold proofing, or cold retardation. After the final shaping, instead of letting the loaves proof at room temperature for a few hours, you place them directly into the refrigerator (around 4°C/39°F). This dramatically slows down the yeast activity, effectively pausing the fermentation. This “pause” can last anywhere from 12 to 72 hours, giving you a massive window in which to bake. This method decouples the fermentation schedule from the baking schedule.
A home baker in the UK, for example, transformed their hobby after nearly giving up on a “dead” starter. Once revived, the starter became so predictable that they could mix and shape dough in the evening, cold-proof it for two days, and bake it before or after their day job. By rotating batches through the fridge, they now successfully bake 20 loaves every week from a standard domestic oven, baking four at a time. This level of production is simply impossible with a weak starter; a weak starter can take 95% longer to ferment the same dough, making any attempt at scheduling futile. A healthy starter doesn’t just make better bread—it gives you control over your time.
This shift from reactive baking (waiting for the dough to be ready) to proactive scheduling is the final step in mastering your starter. It demonstrates a complete understanding of the fermentation process and empowers you to integrate baking seamlessly into your life.
How to Preserve E-Bike Battery Life During a Canadian Winter?
This may seem like an unrelated topic, but understanding how to care for an e-bike battery in a cold Canadian winter provides a perfect analogy for caring for your sourdough starter. Both are living systems—one electrochemical, one biological—that are highly sensitive to temperature. Mismanaging either one in the cold will lead to a dramatic drop in performance and potential long-term damage.
Thinking of your starter as a battery helps to solidify the core principles of cold-weather fermentation care. Just as you wouldn’t leave your expensive e-bike battery in an unheated garage where temperatures drop below freezing, you shouldn’t leave your starter there either. Both systems experience a significant drop in activity—up to 50%—once the temperature falls below 10°C (50°F). A battery will lose its charge, and a starter will go dormant.
The parallels are a powerful mental model for proper care:
- Cold Shock: Both systems can be damaged by rapid temperature changes. You must bring an e-bike battery to room temperature before charging it, and you must do the same for your starter before feeding it for a bake.
- Maintenance Charge/Feeding: You can’t just store a battery or a starter all winter without attention. A lithium-ion battery needs a periodic maintenance charge, and a refrigerated starter needs a minimum of a weekly feeding to stay healthy.
- Permanent Damage: Letting an e-bike battery completely discharge can permanently damage its ability to hold a charge. Similarly, completely starving a starter for months can kill the microbial colony for good.
- Warning Signs: Both systems give you warnings before total failure. An e-bike battery will show a weaker charge; a starter will have a slower rise time or develop off-smells. These are distress signals that require immediate attention.
By applying the same logic you would use to protect an expensive piece of equipment, you instinctively know how to protect your living starter. Both perform best in a comfortable temperature range (20-25°C / 68-77°F) and require consistent maintenance to survive the harsh conditions of winter.
Key Takeaways
- A “dead” starter is usually just dormant and sending distress signals (smell, lack of rise) that can be diagnosed.
- The quality of your flour is non-negotiable; unbleached flour with adequate protein is essential for a healthy microbial ecosystem.
- Temperature is a key lever; creating a stable, warm environment (75-82°F / 24-28°C) is crucial for reviving a sluggish starter in a cold home.
Hobby or Business: When Does Selling Sourdough Require a Commercial Kitchen?
The journey from reviving a “dead” starter to baking consistently delicious bread often leads to an exciting new question: “Could I sell this?” As friends and family praise your loaves, the idea of a small home-based bakery or “micro-bakery” can be tempting. However, this is the point where the hobby intersects with public health regulations, and the rules vary dramatically depending on where you live.
In many parts of the USA, “Cottage Food Laws” allow for the sale of low-risk foods like bread from a home kitchen, but often with revenue limits ($15,000-$50,000 per year) and requirements for food handler permits. In the UK, the system is more straightforward: you can sell from home as long as you register your food business with your local council and comply with hygiene standards, often resulting in a publicly displayed hygiene rating. Canada‘s regulations are determined at the provincial level and can be more restrictive, sometimes requiring permits and inspections that make small-scale home sales challenging. China has the strictest environment, where selling any food prepared at home is generally illegal and requires a full commercial license and a dedicated commercial kitchen.
Navigating these regulations is the first step to turning a passion into a business. It’s essential to contact your local public health authority or municipal council to understand the specific requirements in your area before you sell a single loaf.
This table summarizes the general landscape for selling homemade sourdough bread across different regions, but always verify with your local authorities.
| Country/Region | Home Sales Allowed? | Requirements | Revenue Limits |
|---|---|---|---|
| USA (varies by state) | Yes in most states | Food handler permit, kitchen inspection (some states) | $15,000-$50,000/year depending on state |
| Canada (provincial) | Limited | Provincial health permits required | Varies by province |
| UK | Yes with registration | Register with local council, hygiene rating | No specific limit but tax implications |
| China | Extremely restricted | Commercial license required for any sales | Home sales generally illegal |
This final step in the sourdough journey—from hobbyist to potential professional—is a testament to mastering the craft. As sourdough expert Tom Cucuzza notes, the path is one of continuous learning.
The journey from a failed starter to selling bread is not just about perfecting technique—it’s about understanding that every failure teaches you something essential about fermentation, temperature, and timing.
– Tom Cucuzza, The Sourdough Journey
Start by diagnosing your starter’s current state based on its signals. Once you have a healthy, thriving culture, you can begin to explore not just bread, but a world of recipes that will enrich your kitchen and delight your family.