
The biggest retrofit mistake isn’t choosing the wrong product, it’s choosing it in the wrong order.
- Installing a heat pump before sealing the building envelope leads to oversized, inefficient systems and high energy bills.
- A “fabric-first” approach (insulation, windows, air sealing) allows for a smaller, cheaper, and more effective heat pump.
Recommendation: Always prioritize upgrading the building envelope (insulation, air sealing) *before* calculating the size of your new heating system.
For owners of homes built in the 1950s, the battle against drafts and staggering energy bills is a familiar one. The push towards net-zero has brought a wave of new technologies and advice, with heat pumps often touted as the ultimate solution. You’re told to upgrade your boiler, install solar, and switch to a heat pump to save money and the planet. This advice, while well-intentioned, often misses the most critical factor for a successful and cost-effective retrofit.
The common approach is to treat these upgrades as a checklist of individual items. But what if the real key to maximizing your return on investment wasn’t about choosing between a heat pump and insulation, but about understanding their symbiotic relationship? The secret lies not in the *what*, but in the *when*. A successful, financially-sound retrofit is a game of strategic sequencing. It’s an order of operations where each step builds upon the last to create a high-performance system rather than a collection of expensive, underperforming parts.
This contractor’s guide moves beyond the simple “fabric first” mantra to give you the technical and financial reasoning behind the correct sequence. We will dissect common points of failure, from grant rejections to mismatched equipment, to build a clear roadmap. By understanding the correct order of operations, you can prevent costly mistakes, ensure your new heating system is sized correctly, and build a truly comfortable, efficient, and valuable home.
To navigate the complexities of a home energy retrofit, we will explore the crucial decisions you’ll face. This article breaks down each element in a logical sequence, from securing funding to selecting the right materials and systems, ensuring you have a clear plan for maximizing efficiency and value.
Summary: Heat Pump or Insulation: Which Upgrade Gives the Best ROI for 1950s Homes?
- Why 40% of Grant Applications for Home Energy Retrofits Get Rejected?
- Is Triple Glazing Worth the Extra 30% Cost in Moderate Climates?
- Bamboo vs Local Pine: Which “Eco” Floor Actually Has a Lower Footprint?
- Boiler First or Windows First: The Order That Maximizes Efficiency
- Solar Panels on Historic Roofs: How to Get Approval Without Ruining the Facade?
- How to Improve Ventilation in Apartments with Sealed Windows?
- Native Wildflowers vs Manicured Lawns: Which Saves Taxpayers More?
- Why 40% of Grant Applications for Home Energy Retrofits Get Rejected?
Why 40% of grant applications for home energy retrofits get rejected?
Government grants like the Canada Greener Homes Initiative or the UK’s Boiler Upgrade Scheme represent a massive opportunity to reduce the cost of a retrofit. Yet, a significant number of homeowners are left disappointed when their applications are denied. The rejections rarely stem from the project’s merit but almost always from procedural errors and a failure to understand the strict rules of engagement. This isn’t just about ticking boxes; it’s about following a prescribed sequence.
The most common and devastating mistake is starting work before receiving grant approval. Any work initiated prior to official application submission is automatically deemed ineligible, resulting in a total loss of funding for that portion of the project. Another major pitfall is failing to complete mandatory energy assessments. For instance, in Canada, both pre- and post-retrofit EnerGuide evaluations are mandatory and must be performed by a certified energy advisor. Skipping either of these steps is a guaranteed reason for rejection.
Furthermore, these programs maintain strict lists of eligible products and certified installers. You can’t just pick any heat pump or insulation material; it must meet specific performance ratings (like AHRI ratings for heat pumps) and be on the program’s approved list. Assuming your preferred product qualifies without verification is a costly gamble. Success requires treating the grant application not as an afterthought, but as the foundational first step that dictates the entire project’s timeline, product selection, and execution plan.
Action plan: How to avoid grant application rejection
- Apply First, Work Later: Submit your grant application and receive approval BEFORE starting any demolition or installation. Work started prematurely is automatically ineligible.
- Complete Mandatory Audits: Schedule and complete the required pre-retrofit energy evaluation (e.g., EnerGuide in Canada) with a certified advisor to get your baseline and project recommendations.
- Verify Product Eligibility: Before purchasing, ensure every product—from the heat pump to insulation panels—is explicitly listed on the grant program’s official eligible equipment list and meets required performance ratings.
- Use Certified Professionals: Check if the program requires work to be done by registered or certified contractors. Using an uncertified installer can void your eligibility.
- Meet All Deadlines: Complete the work and the final post-retrofit evaluation within the program’s specified timeframe. Missing the final deadline can nullify the entire grant.
Understanding these administrative hurdles is the first part of the battle. The next involves making technically and financially sound decisions about the upgrades themselves.
Is triple glazing worth the extra 30% cost in moderate climates?
Windows are a significant source of heat loss in older homes, so upgrading them seems like a logical priority. The debate then becomes: double or triple glazing? While triple glazing offers superior thermal performance on paper, its cost-effectiveness is highly dependent on your climate. In extremely cold regions, the energy savings can justify the 25-30% price premium. However, for homeowners in moderate climates like most of the UK or coastal British Columbia, the math is less convincing.
For a typical UK home, upgrading from modern double glazing yields modest additional savings of only £20-£50 per year. When you factor in the higher upfront cost, the payback period can easily stretch to 40 years or more, far exceeding the lifespan of the window unit itself. The primary benefit in these climates is often improved acoustic insulation and reduced internal condensation, not dramatic energy savings. The real ROI comes from replacing old, single-pane or early-generation double-pane windows, where even modern high-performance double glazing represents a monumental leap in efficiency.
The cross-section of a triple-glazed unit clearly shows its advanced design, with three panes of glass and two inert gas-filled cavities (like Argon or Krypton) that act as insulators. This construction significantly reduces thermal transfer.

While this technical superiority is clear, the decision must be a financial one. As the data shows, the return on investment diminishes rapidly in milder weather. Your money is often better spent elsewhere in the building envelope before paying the premium for triple glazing in a moderate climate.
The following table illustrates how climate profoundly impacts the financial viability of choosing triple glazing over modern double glazing. Notice how the payback period shifts dramatically based on location.
| Climate Zone | Double Glazing U-value | Triple Glazing U-value | Annual Energy Savings | Payback Period |
|---|---|---|---|---|
| London, UK (Damp-Moderate) | 1.4 W/m²K | 0.8 W/m²K | £20-50 | 40+ years |
| Vancouver, Canada (Cool-Moderate) | 0.30-0.35 | 0.15-0.25 | $200-400 CAD | 5-10 years |
| San Francisco, USA (Sunny-Moderate) | 0.30 | 0.20 | Minimal benefit | Not cost-effective |
This principle of looking beyond the marketing label applies not just to windows, but to all materials, including those promoted as “eco-friendly.”
Bamboo vs local pine: which “eco” floor actually has a lower footprint?
When choosing interior finishes, “eco-friendly” labels can be misleading. Bamboo flooring is often marketed as a green alternative to traditional hardwood because it’s a rapidly renewable grass. However, a material’s true environmental impact is measured by its entire lifecycle, including processing and transportation. This is where the concept of embodied carbon—the total greenhouse gas emissions generated to produce and deliver a material—becomes critical.
Recent lifecycle assessments reveal a surprising truth. The manufacturing of bamboo flooring is an energy-intensive process involving adhesives, high heat, and pressure. A 2024 study on bamboo scrimber flooring, a popular durable variant, found its production process was responsible for significant carbon emissions, with one type reaching nearly 1846 kg of CO2 equivalent per cubic meter. This is largely due to the resins and heat treatment required to turn bamboo strands into a hard-wearing floorboard.
In contrast, locally sourced solid wood flooring, such as pine from a sustainably managed forest in your region, has a much simpler production path. It is felled, sawn, and dried, often with far less chemical and energy input. Crucially, its transportation footprint is minimal. Shipping heavy bamboo flooring halfway across the world from Asia to Europe or North America adds a massive amount of “transport carbon” to its final tally. As leading research confirms, the manufacturing process itself can make bamboo a less-than-ideal environmental choice.
Although bamboo scrimber flooring had a higher utilization rate of raw material and better economic performance, from the perspective of environment protection, bamboo scrimber flooring caused more negative impact on the environment than bamboo laminated flooring
– BioResources Journal Authors, Environmental impact study via life cycle assessment
This detailed analysis is even more critical when we move from finishes to the core systems of the home, where the order of operations dictates everything.
Boiler first or windows first: the order that maximizes efficiency
This is the central question of any major retrofit and where the “Order of Operations” becomes paramount. The common temptation is to replace an old, inefficient boiler or furnace with a high-efficiency heat pump first, expecting immediate savings. This is often a costly mistake. Installing a new heating system in a leaky, poorly insulated house is like putting a powerful engine in a boat full of holes. You’ll need a much bigger engine just to stay afloat, and it will burn through fuel at an alarming rate.
The correct sequence is always “fabric first.” This means prioritizing the building envelope integrity: insulation (attic, walls), air sealing (gaps and cracks), and high-performance windows. By reducing heat loss first, you dramatically lower the home’s overall heating demand. This has a powerful cascading effect. A well-insulated home requires a much smaller heating system to maintain a comfortable temperature. This means that after you’ve improved the envelope, you can purchase a smaller, and therefore less expensive, heat pump.
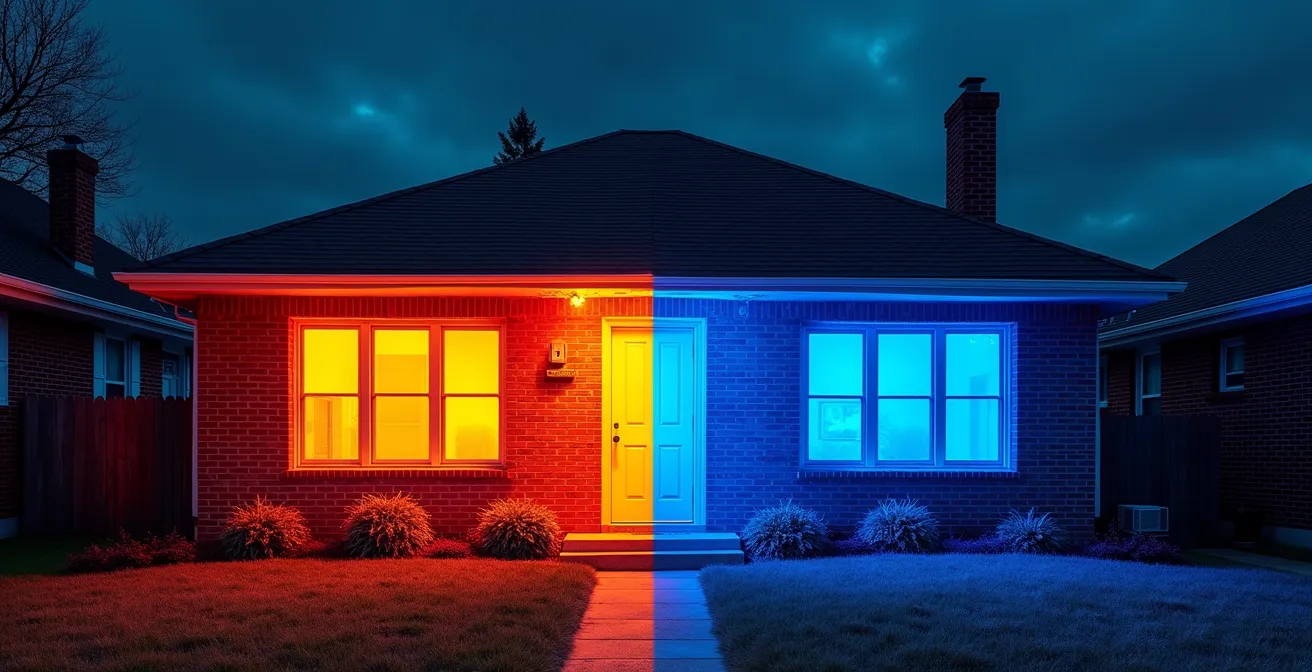
The difference is starkly visible with thermal imaging. An uninsulated 1950s house bleeds heat (shown in reds and yellows), forcing the heating system to work constantly. The same house, after insulation and air sealing, retains its heat (shown in blues and greens), requiring far less energy.
This “right-sizing” of the heat pump is where the true ROI is unlocked. Not only is the initial capital cost lower, but the smaller system will run in shorter, more efficient cycles, reducing wear and tear and lowering your monthly bills for its entire lifespan. As experts at Energy Star note, because improving insulation first may allow you to choose a smaller, less expensive heat pump, the “fabric first” approach pays for itself twice.
Fixing the building envelope is the undisputed first step for any home, but what about homes with special considerations, like historical designations?
Solar panels on historic roofs: how to get approval without ruining the facade?
For owners of historic or heritage-listed properties, the desire to embrace modern, sustainable technology like solar panels can clash with the need to preserve the building’s character and architectural integrity. Many assume that planning authorities will outright reject such additions, or that installation will cause irreversible damage. However, with careful planning and modern techniques, it’s entirely possible to integrate solar energy without compromising a home’s historic value.
The key is a “less is more” approach focused on visibility and reversibility. Most preservation guidelines prioritize keeping solar panels off primary, street-facing roof elevations. Instead, panels should be installed on less conspicuous areas, such as a rear-facing roof, a modern extension, or a separate structure like a garage. Using panels that have a similar color and finish to the roofing material can also help them blend in, reducing their visual impact.
Crucially, fears of permanent damage are often outdated. Modern mounting systems have been designed specifically for sensitive applications. They can often be installed without penetrating the historic roofing material itself, instead using weighted systems or clamping onto roof seams. This ensures the entire installation can be removed in the future, leaving the original fabric of the building intact. As guidance from planning authorities often highlights, the temporary nature of these systems is a major selling point.
Modern solar panel installations are completely reversible. Mounting systems can be used that have minimal impact on the historic roofing material and can be removed in the future without permanent damage
– Historic Preservation Planning Guidance, EPA guidance on renovation and energy efficiency in historic homes
This forward-thinking approach also applies to challenges inside the building, particularly in multi-unit dwellings where window replacement isn’t an option.
How to improve ventilation in apartments with sealed windows?
As we make our homes more airtight to save energy, we can inadvertently create a new problem: poor indoor air quality. In modern apartments with sealed, inoperable windows, this issue is magnified. Without natural airflow, pollutants like CO2 from breathing, volatile organic compounds (VOCs) from furniture, and excess humidity can build up to unhealthy levels. Studies have shown that poor ventilation leads to high indoor CO2 levels that can impair concentration and overall cognitive function.
Since you can’t just open a window, the solution must be mechanical. The most effective technology for this scenario is a Heat Recovery Ventilator (HRV) or an Energy Recovery Ventilator (ERV). These devices simultaneously exhaust stale indoor air and supply fresh, filtered outdoor air. The “recovery” magic happens in the core of the unit, where heat from the outgoing stale air is transferred to the incoming fresh air, dramatically reducing the energy penalty of ventilation in winter.
For apartments without existing ductwork, single-room HRV/ERV units are an ideal solution. They are installed directly through an exterior wall and provide ventilation for a specific zone. The choice between an HRV and an ERV depends on your climate.
- HRVs (Heat Recovery Ventilators) are best for colder, drier climates like most of Canada. They transfer heat but not moisture, which helps prevent excessive dryness indoors during winter.
- ERVs (Energy Recovery Ventilators) are better suited for more humid climates like the UK or the US South. They transfer both heat and a portion of the moisture, which helps keep excess humidity out in the summer and retain some indoor humidity in the winter.
Just as we engineer our indoor environment, we can also engineer our outdoor space to be more sustainable and cost-effective.
Native wildflowers vs manicured lawns: which saves taxpayers more?
The classic manicured lawn is an icon of suburban life, but it’s an incredibly resource-intensive feature. It demands constant mowing, fertilizing, and irrigation, all of which come with significant financial and environmental costs. While this section looks at municipal savings, the principles apply directly to homeowners looking to reduce costs and labor. Shifting from a traditional lawn to a native wildflower meadow offers substantial savings across the board.
The most immediate saving is on maintenance. A lawn may need to be cut 20-30 times a year, whereas a native meadow only requires cutting once or twice annually. This represents a 90-95% reduction in mowing costs, fuel consumption, and labor. Furthermore, native plants are adapted to the local climate and soil, eliminating the need for artificial fertilizers and significantly reducing, or even eliminating, the need for irrigation once established. They are naturally drought-tolerant and thrive without chemical intervention.
Beyond direct maintenance, native meadows provide valuable ecosystem services. Their deep and complex root systems are far more effective at absorbing rainwater than the shallow roots of turfgrass. This reduces stormwater runoff, lessening the burden on municipal drainage systems and helping to prevent localized flooding. This is a benefit that saves the entire community money on infrastructure costs.
The data clearly shows that a native wildflower meadow isn’t just a beautiful, biodiversity-promoting choice; it is a fiscally responsible one that offers dramatic long-term savings.
| Maintenance Aspect | Manicured Lawn (Annual Cost/Hectare) | Native Wildflower Meadow (Annual Cost/Hectare) | Savings |
|---|---|---|---|
| Mowing Frequency | 20-30 cuts/year | 1-2 cuts/year | 90-95% reduction |
| Fertilizer Application | Required quarterly | None required | 100% reduction |
| Irrigation | Regular watering needed | Drought-tolerant natives | 75-100% reduction |
| Stormwater Management | High runoff rates | Deep roots absorb more water | Reduced infrastructure costs |
With all these individual decisions explored, we can now circle back to the starting point—the grant application—and see how they all tie together.
Key takeaways
- Prioritize “Fabric First”: Insulate and air-seal before upgrading heating systems to ensure proper system sizing and efficiency.
- Not all “eco” products are equal: Always consider the full lifecycle, including embodied carbon and shipping, not just the material itself.
- Follow grant rules precisely: Grant applications fail on technicalities like pre-work evaluations and using non-approved products. Plan your sequence accordingly.
Why 40% of grant applications for home energy retrofits get rejected?
We return to this critical question, but with a new perspective. The 40% failure rate isn’t just a statistic about paperwork; it’s a direct symptom of poor project planning and a misunderstanding of the “Order of Operations.” A successful grant application is the natural outcome of a well-sequenced project. When you follow the logical path of a retrofit, you automatically meet the grant’s requirements.
Consider the evidence. A grant requires a pre-retrofit energy audit. This audit will inevitably recommend improving the building envelope first—the very foundation of the “fabric first” principle. A grant specifies eligible products. By researching these *after* you’ve insulated and know your true heating demand, you can select a “right-sized,” grant-approved heat pump. The grant timeline requires work to be completed by a certain date. A well-sequenced plan, where you’re not trying to install a heat pump in a leaky house, avoids unforeseen complications and delays that jeopardize deadlines.
In essence, you “grant-proof” your project not at the application stage, but at the strategic planning stage. The application form simply becomes the document that reflects your sound, logical plan. The rejections happen when homeowners try to force a product-first decision—”I want this heat pump”—into a system that is designed to reward a holistic, fabric-first approach. By embracing the correct sequence, you align your project with the very logic that underpins these funding programs, making approval the most likely outcome.
To turn these principles into action, the next logical step is to create a detailed retrofit plan for your property, starting with a comprehensive energy audit to establish your baseline and identify the most critical areas for envelope upgrades.